 |
|||
|
|
|||
|
Page Title:
FUEL BURNING PERSONNEL HEATER REMOVAL, REPAIR, TEST, AND REPLACEMENT - continued |
|
||
| ||||||||||
|
|
 TM 9-2320-209-34-2-3
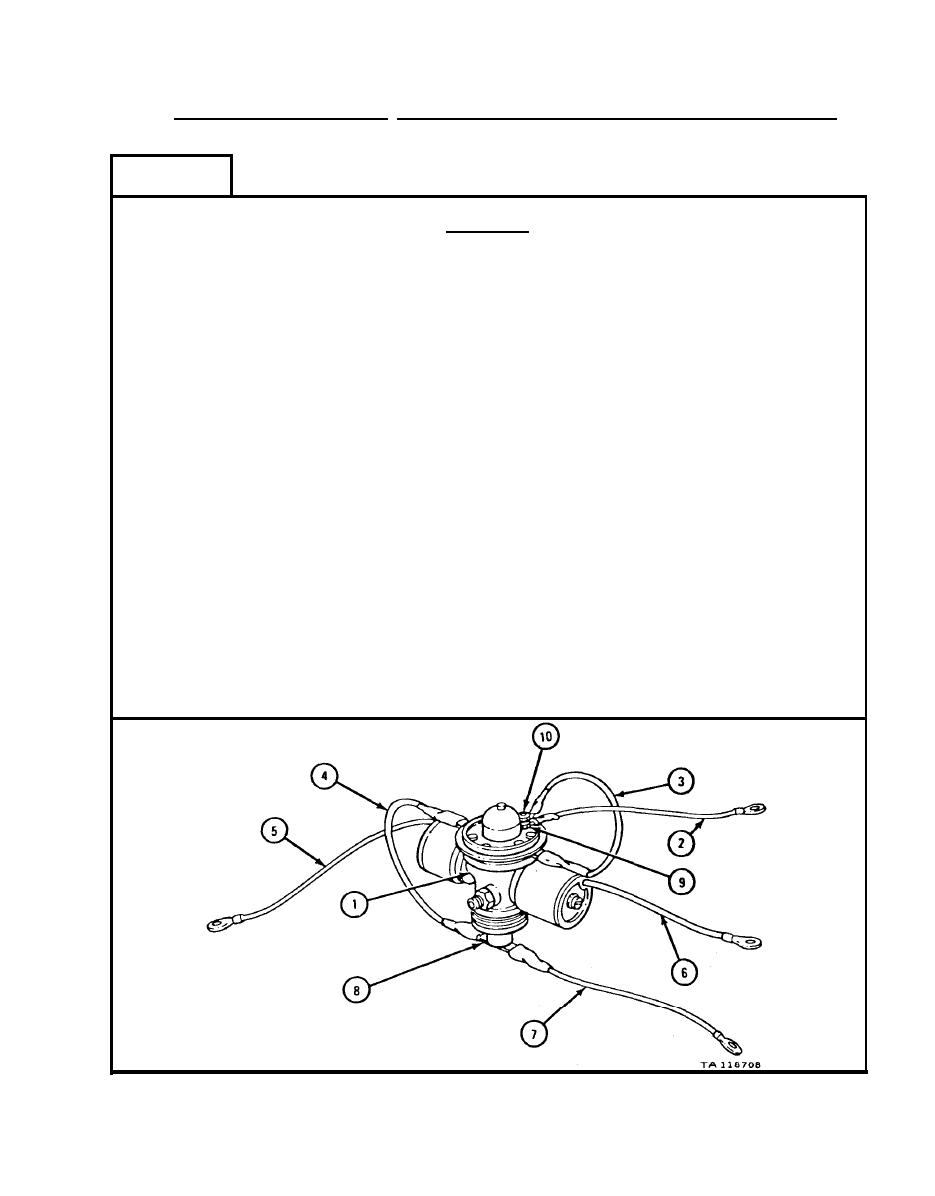
Disassembly, Inspection, Repair, Assembly, and Test of Fuel Control Valve.
e.
FRAME
1
CAUTION
Do not dip fuel control valve (1) in dry clean-
ing solvent. Electrical parts may be damaged
by doing so.
1.
Wipe fuel control valve (1) clean with a clean cloth dipped in dry cleaning
solvent, wipe fuel control valve dry.
2.
Check that fuel control valve (1) has no cracked or broken parts. If
cracks or breaks are found, do step 6.
3.
Check that electrical leads (2, 3, 4, 5, 6, and 7) have no broken or
frayed insulation or damaged connectors on ends. If any electrical leads
or connectors are damaged, do step 6.
4.
Using ohmmeter, check continuity through heater by placing one ohmmeter
lead on terminal (8) and other ohmmeter lead on terminal (9). Circuit
should be closed. If circuit is open, do step 6.
5.
If fuel control valve (1) passes tests, go to frame 2. If you must get new
fuel control valve, do step 6.
NOTE
Electrical leads (2 and 7) must be used on new fuel
control valve (1).
Unscrew and take off nut (10). Take off electrical lead (2) and slide
6.
off electrical lead (7). Get new fuel control valve (1).
END OF TASK
|
|
Privacy Statement - Press Release - Copyright Information. - Contact Us |