 |
|||
|
|
|||
|
Page Title:
CTIS Troubleshooting - continued |
|
||
| ||||||||||
|
|
 TM 9-2320-386-24-1-1
0019 00
CTIS Troubleshooting (Contd)
MALFUNCTION
TEST OR INSPECTION
CORRECTIVE ACTION
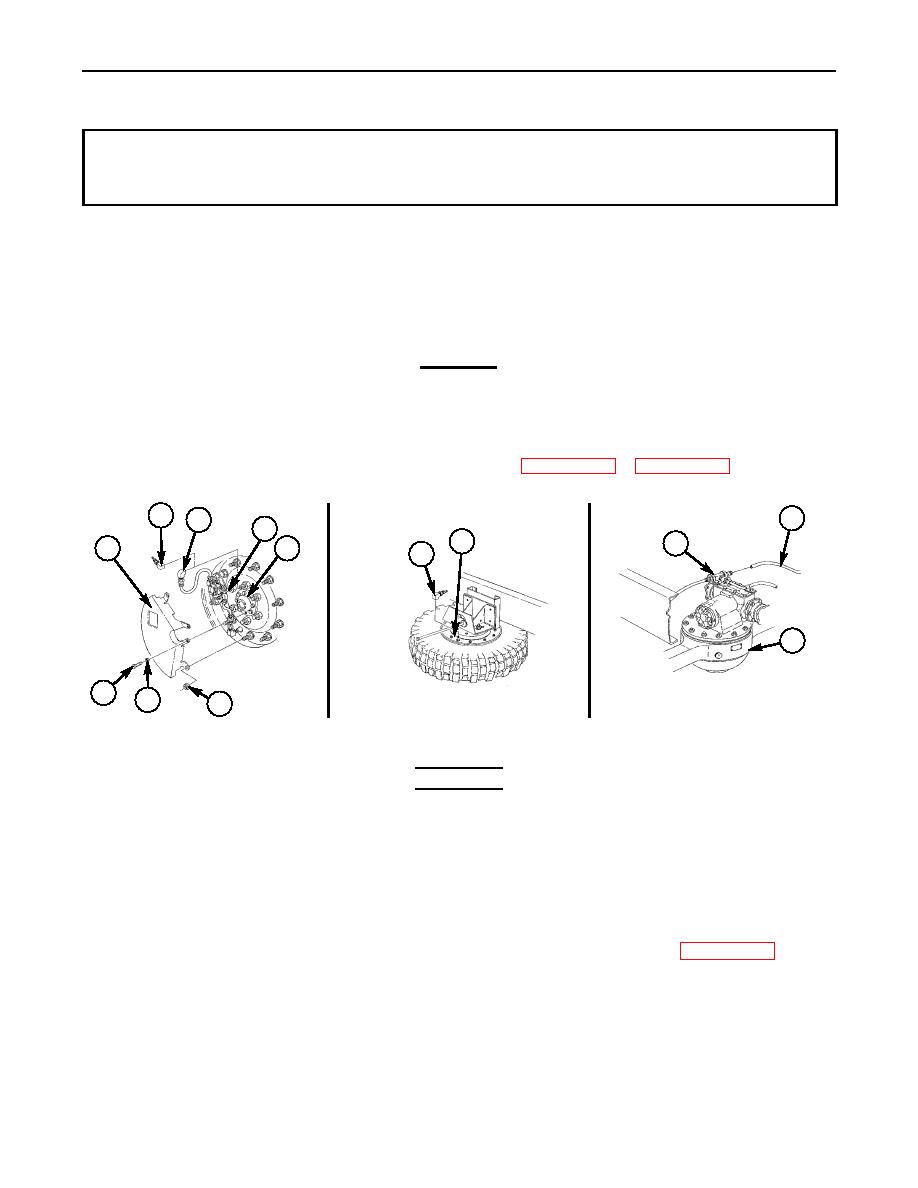
Test 1. Hub pressure test.
Step 1. Remove two nuts (6), screws (8), lockwashers (7), and wheel cover (1) from wheel (5).
Step 2. Remove tube and connector elbow (3) from hollow stud (4).
Step 3. Remove elbow and valve assembly (2) from spare tire (9).
Step 4. Install elbow and valve assembly (2) on hollow stud (4).
Step 5. Disconnect air tube (11) from tee (10) at center of axle (12).
CAUTION
Do not damage O-ring inside of tee when plugging tee. Damaged
O-ring may cause air leak when reassembling air line.
Step 6. Plug tee (10).
Step 7. Using BII air hose, pressurize hub to 50 psi (345 kPa) and observe the air pressure gauge.
Step 8. If the air pressure drops rapidly, repair hub (WP 0173 00 or WP 0172 00).
2
11
3
4
9
10
1
5
2
12
8
7
6
END OF TESTING!
4.
TIRE(S) WILL NOT DEFLATE
WARNING
Eyeshields must be worn when releasing compressed air.
Failure to do this may result in injury to personnel.
Do not disconnect air lines before draining air reservoirs.
Small parts under pressure may shoot out with high
velocity, causing injury to personnel.
Step 1. If ECU is not operating, see malfunction 6.
Step 2. If manifold is not operating, perform test 1.
Step 3. Check air flow at turret valve. If no air is present, repair beadlock (WP 0175 00).
END OF TESTING!
|
|
Privacy Statement - Press Release - Copyright Information. - Contact Us |
