 |
|||
|
|
|||
|
|
|||
| ||||||||||
|
|
 TM 9-2320-209-34-2-3
FRAME 3
CAUTION
Wrap worm (1) in cloth before placing in vise, to
protect worm from damage by vise jaws.
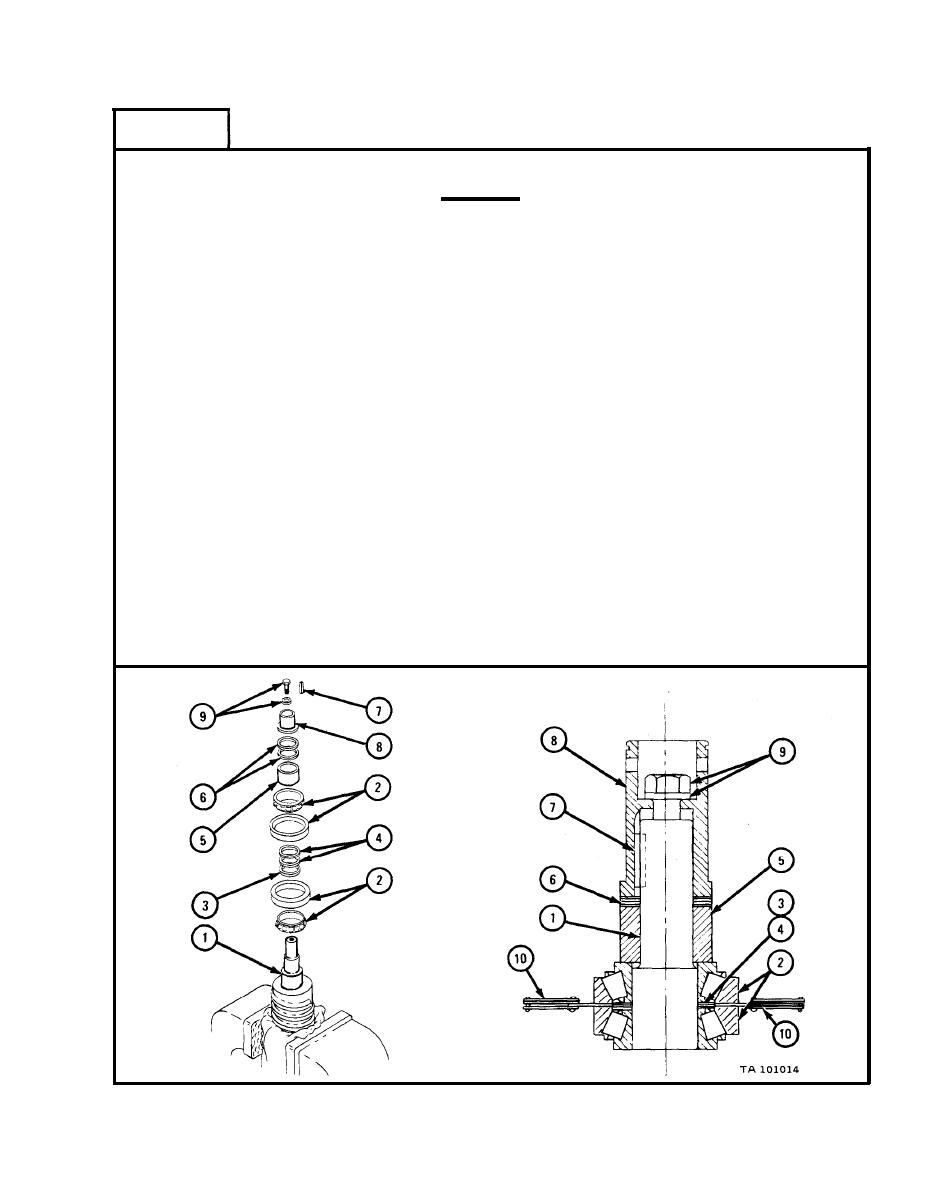
Put worm (1) in a vertical position in a vise, with sprocket end of wormshaft
1.
facing upward.
Put first bearing assembly (2) on shaft of worm (1).
2.
Put washer (3) and shim set (4) on shaft of worm (1).
3.
Put second bearing assembly (2) on shaft of worm (1).
4.
Put spacer (5), shim set (6), key (7), and sleeve (8) on shaft of worm. Put
5.
on capscrew and washer (9).
Put two 0.005-inch feeler gages (10) (180 apart) between cups of first and
6.
second bearing assemblies (2). Check for 0.005 to 0.007-inch clearance
between cups.
NOTE
Be sure that both bearing cups are properly seated
against bearings when checking clearance.
If needed, take off parts from wormshaft and fix bearing shim set (4) by
7.
adding or taking out shims for proper bearing cup clearance.
Take off parts (2 through 9) from worm (1). Take out worm (1) from vise.
8.
GO TO FRAME 4
18-115
|
|
Privacy Statement - Press Release - Copyright Information. - Contact Us |