 |
|||
|
|
|||
|
Page Title:
BORING CASE AND GEARS REMOVAL, REPAIR, AND REPLACEMENT (TRUCK M764) - continued |
|
||
| ||||||||||
|
|
 TM 9-2320-209-34-2-2
FRAME 3
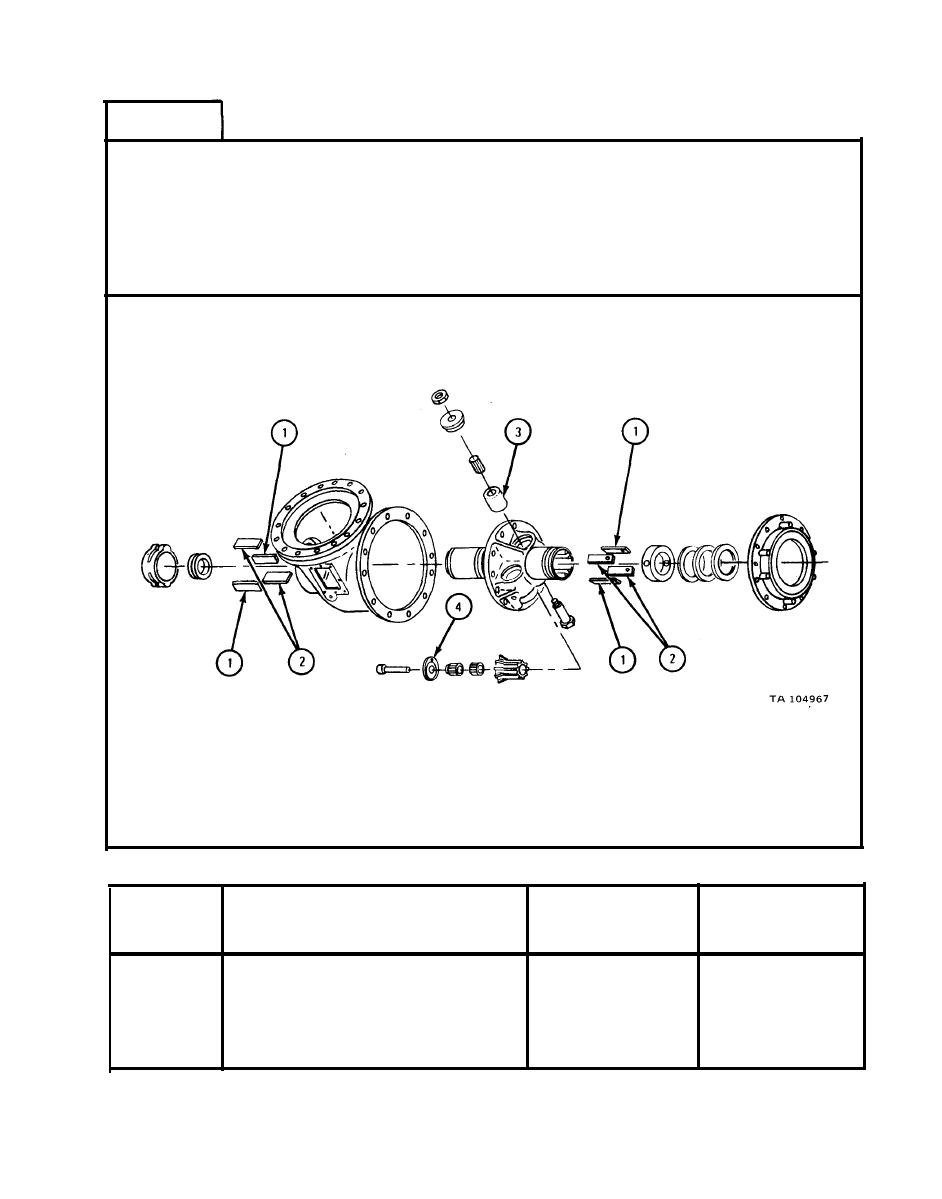
Measure thickness of four thrust plates (1).
1.
2.
Measure thickness of four thrust plates (2).
3.
Measure outside diameter of rack thrust roller (3).
4.
Measure thickness of spur pinion thrust washer (4).
END OF TASK
Table 17-3. Boring Case Gear Assembly Wear Limits
Size and Fit
Wear Limits
of New Parts
Index
(inches)
(inches)
Item /Point of Measurement
Number
0.302
to
0.305
0.307 to 0.313
Thrust plate
1
0.365
to
0.368
0.370 to 0.376
Thrust plate
2
3.313
to
3.315
3.328 to 3.330
3
Rack thrust roller
0.130
to
0.135
0.140 to 0.145
4
Spur pinion thrust washer
|
|
Privacy Statement - Press Release - Copyright Information. - Contact Us |