 |
|||
|
|
|||
|
Page Title:
Inspection and Repair - continued |
|
||
| ||||||||||
|
|
 TM 9-2320-209-34-2-1
1.
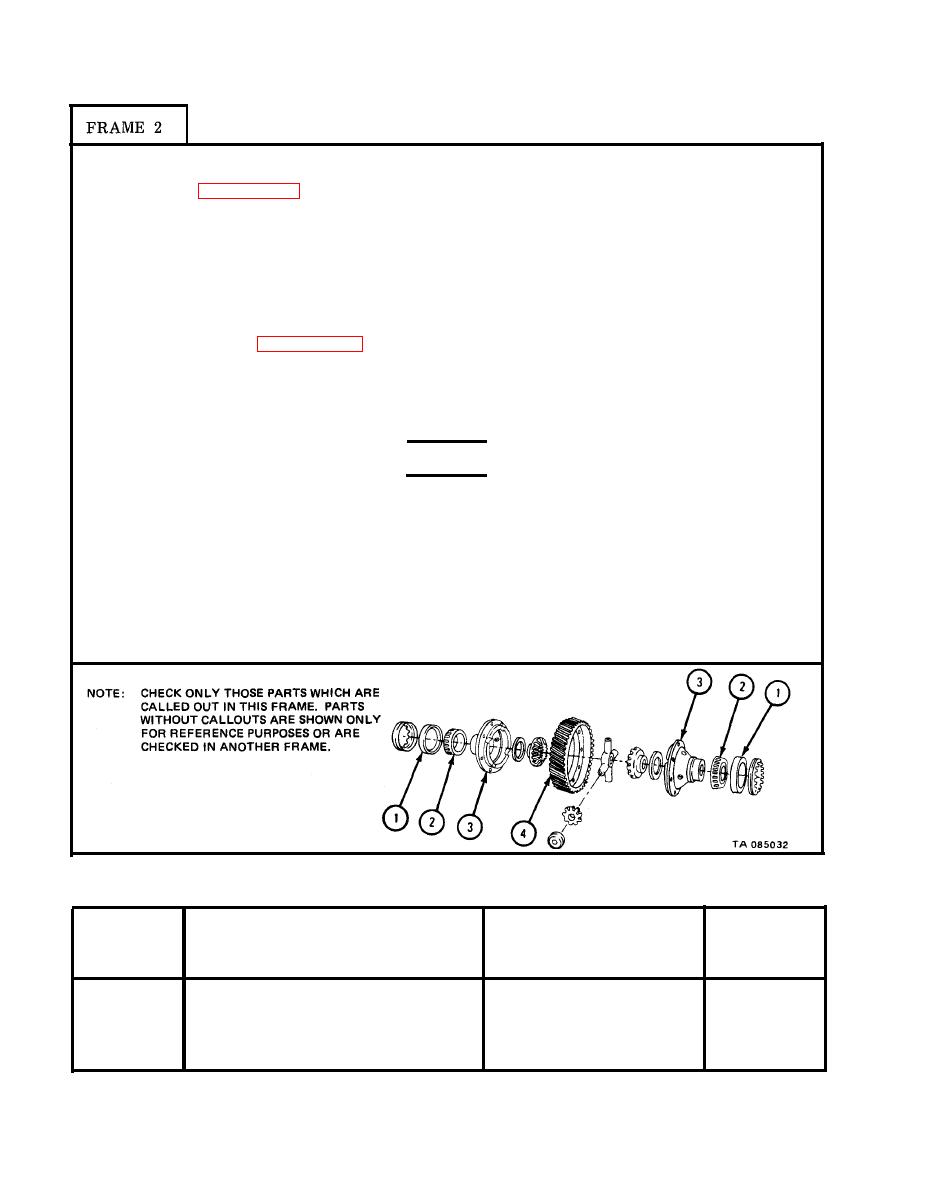
Check that two bearing cups (1) and two bearing cones (2) are not damaged.
Refer to para 10-8.
Using inside micrometer, measure inside diameter of bearing cones (2). Note
2.
measurements.
Using out side micrometer, measure out side diameters of two differential case
3.
halves (3). Note measurements.
Subtract measurement made in step 3 from measurement made in step 2.
4.
Check that fit of bearing cones (2) on differential case halves (3) is within
limits given in table 10-5. If fit of bearing cones is not within limits given,
get new parts in place of worn ones.
Mount each differential case half (3) in a lathe. Place dial indicator against
5.
flange that mounts to helical drive gear (4). Check that runout flange of
differential case half is not more than 0.002 inch.
WARNING
Dry cleaning solvent is flammable. Do not use near an
open flame. Keep a fire extinguisher nearby when sol-
vent is used. Use only in well-ventilated places.
Failure to do this may result in injury to personnel and
damage to equipment.
6. If differential case half (3) runout is more than 0.002 inch, use lathe to
cut away only enough metal to bring runout within limit. Take off burrs
with a honing stone. Clean differential case half with dry cleaning solvent.
GO TO FRAME 3
(The letter T shows a tight fit.)
Size and Fit
Wear Limit
Index
of New Parts
Item/Point of Measurement
(inches)
Number
(inches)
Fit of bearing on case
2 and 3
0.0025T to 0.0050T
0.0020T
|
|
Privacy Statement - Press Release - Copyright Information. - Contact Us |