 |
|||
|
|
|||
|
|
|||
| ||||||||||
|
|
 TM 9-2320-209-34-2-1
d.
Inspection and Repair.
NOTE
Readings must be within limits given in table 10-1. If
readings are not within given limits, throw away parts
and get new ones.
1.
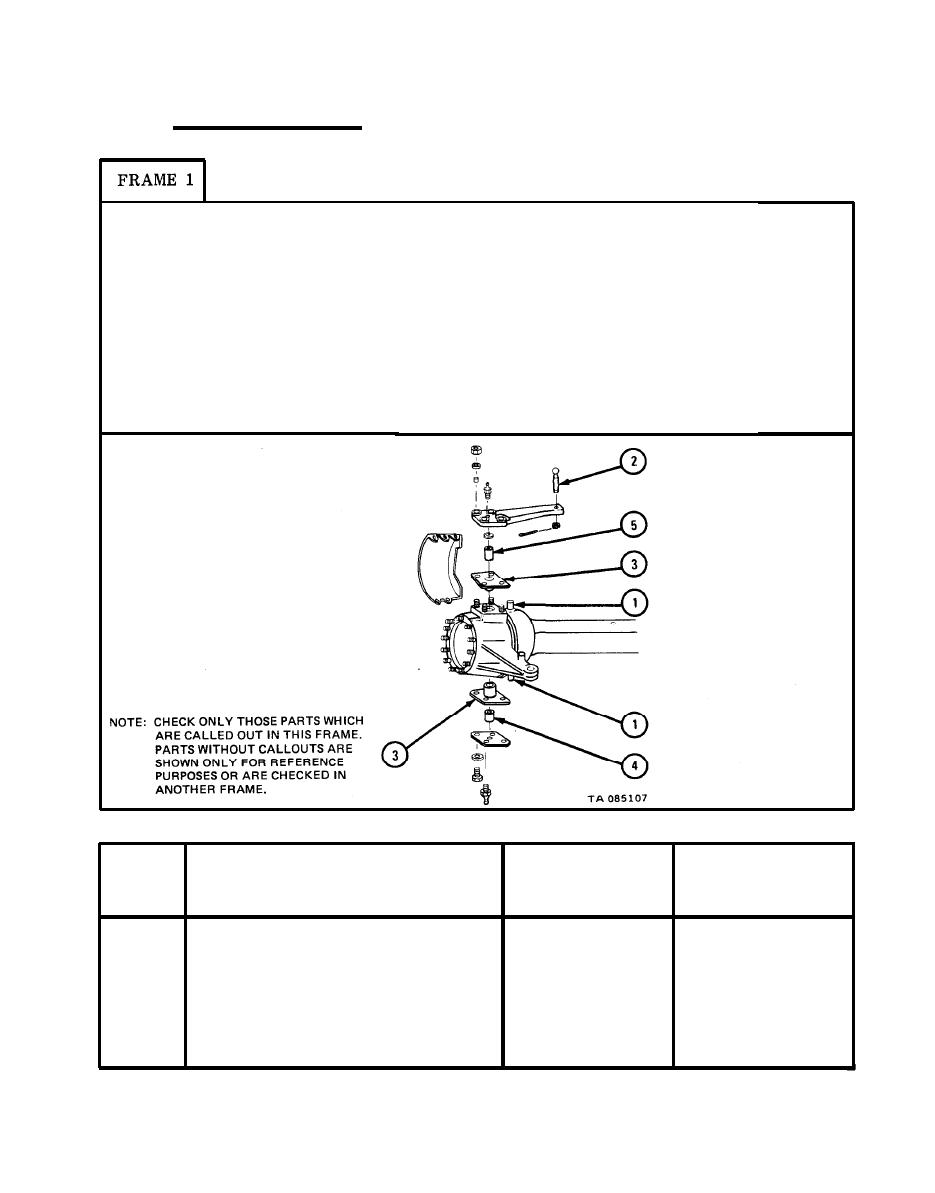
Using micrometer, measure outside diameter of steering knuckle pins
Using micrometer, measure outside diameter of ball stud (2).
2.
Using micrometer, measure inside diameter of steering knuckle sleeve (3).
3.
4.
Using micrometer, measure inside diameter of bushing (4 and 5).
GO
TO FRAME 2
Table 10-1. Front Axle Assembly (Steering Knuckle) Wear Limits
Size and Fit
of New Parts
Wear Limit
Index
Item/Point of Measurement
Number
(inches)
(inches)
1.1240 to 1.1235
1
1.1230 to 1.1240
Steering knuckle pin (outside
diameter)
2
Ball stud (outside diameter)
1.245 to 1.235
1.225 to 1.245
1.248 to 1.250
1.248 to 1.250
3
Steering knuckle sleeves (inside
diameter)
4 and 5
Bushing (inside diameter)
1.1250 to 1.1260
1.1250 to 1.1260
|
|
Privacy Statement - Press Release - Copyright Information. - Contact Us |