 |
|||
|
|
|||
|
Page Title:
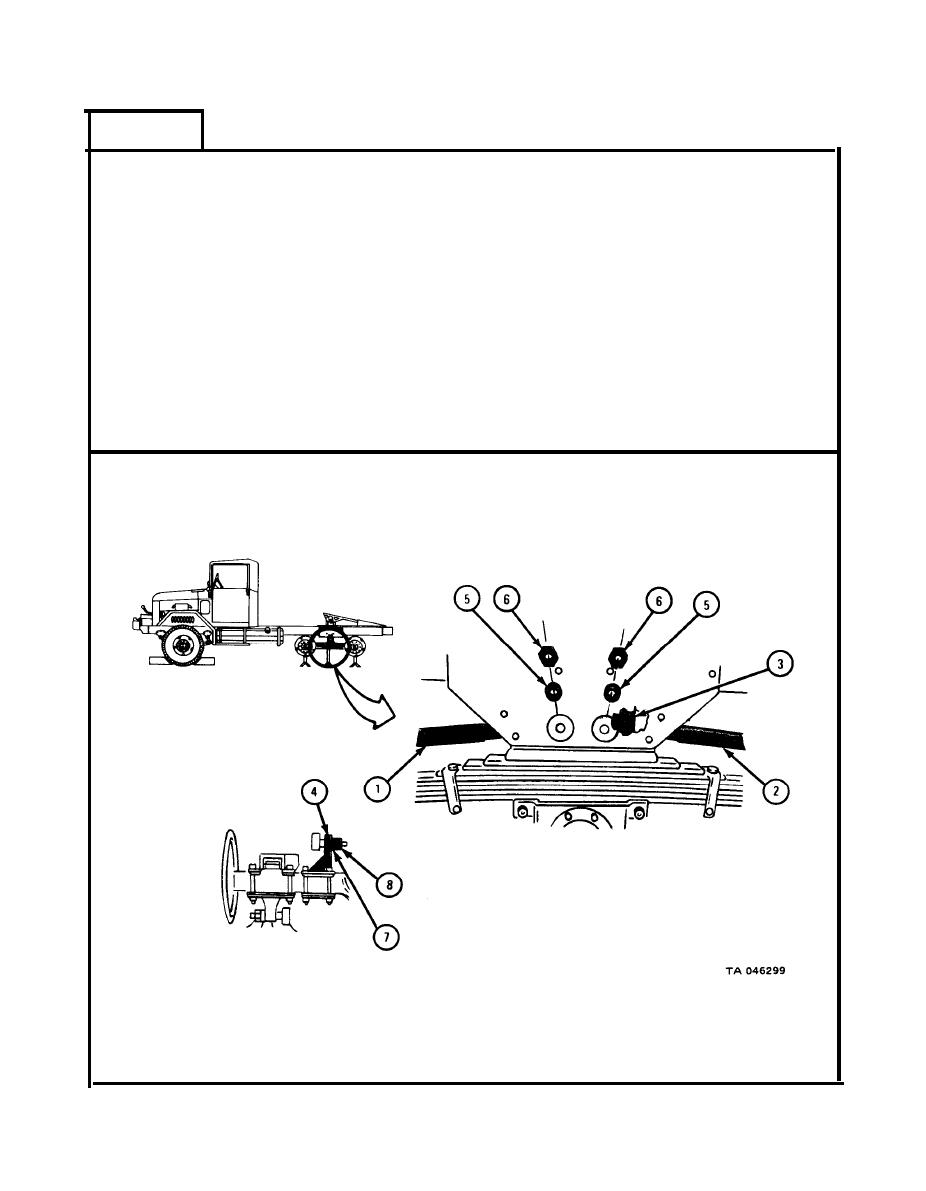
TORQUE RODS REMOVAL AND REPLACEMENT - continued |
|
||
| ||||||||||
|
|
 TM 9-2320-209-20-3-2
FRAME 2
1.
Put ends of two upper torque rods (1 and 2) into holes in bracket (3).
Put other end of torque rod (1) into holes in bracket (4) on forward-rear
2.
axle. Put other end of torque rod (2) in bracket (4) on rear-rear axle.
Using sledge hammer, tap four ends of torque rods (1 and 2) into brackets
3.
(3 and 4).
Using 1 7/16-inch socket wrench, screw on two lockwashers (5) and nuts (6),
4.
and two lockwashers (7) and nuts (8).
Using torque wrench with 1 7/16-inch socket, tighten two nuts (6) to 350
5.
to 400 pound-feet.
6.
Using torque wrench with 1 7/16-inch crow foot adapter, tighten nut (8) to
350 to 400 pound-feet.
GO TO FRAME 3
17-67
|
|
Privacy Statement - Press Release - Copyright Information. - Contact Us |
