 |
|||
|
|
|||
|
Page Title:
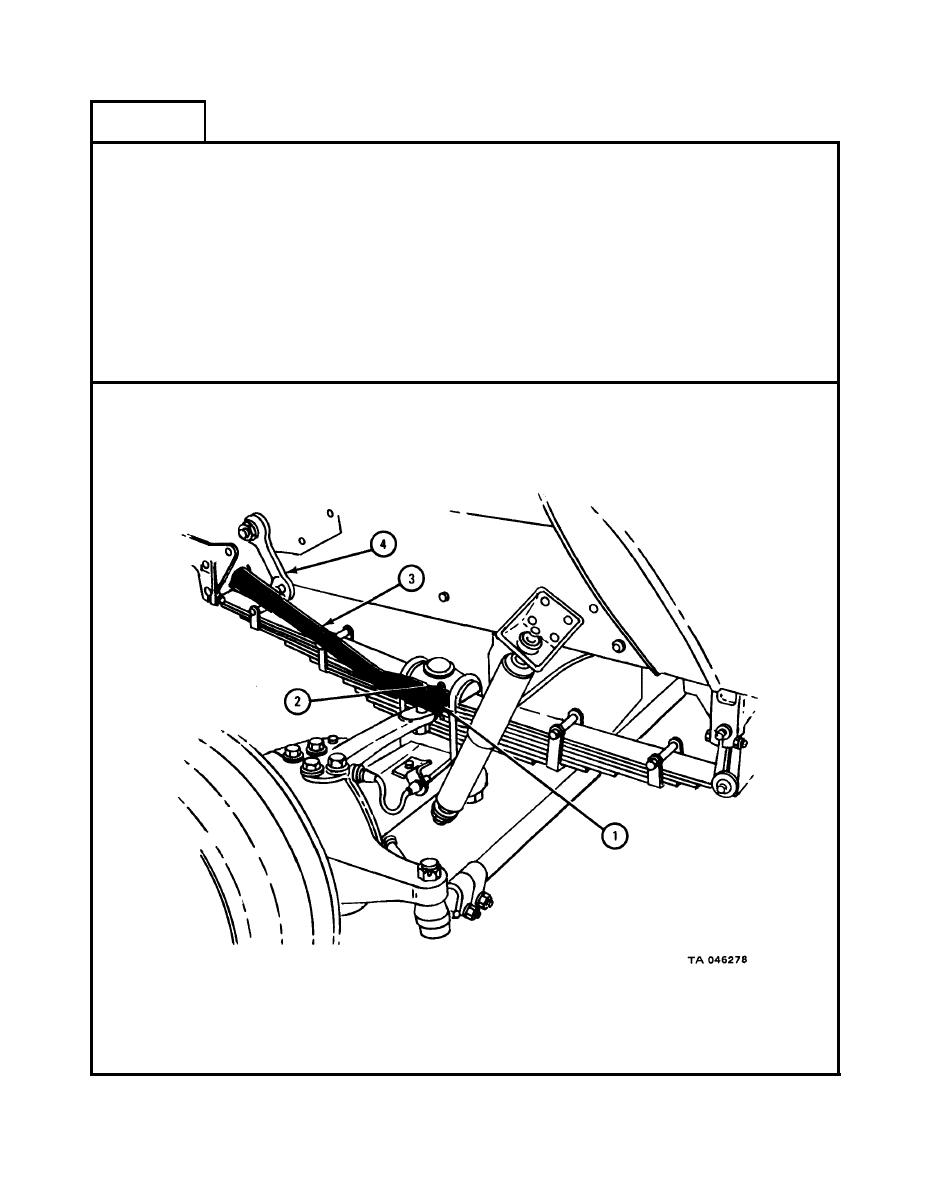
DRAG LINK ASSEMBLY REMOVAL AND REPLACEMENT - continued |
|
||
| ||||||||||
|
|
 TM
9-2320-209-20-3-2
FRAME
4
1.
Lubricate
drag
link.
Refer
to
LO
9-2320-209-12/1.
2.
bit, screw
in
and
tighten
adjusting
plug
(1).
Unscrew
Using
screwdriver
adjusting
plug
one
half
turn
or
less, until
cotter
pin
slot
lines
up
with
holes.
3.
Using
pliers,
open
ends
of
cotter
Put cotter
pin
(2)
through
drag
link
(3).
pin.
4.
Go
to
pitman
arm
(4)
end
of
drag
link
(3).
Do
steps
2
and
3
again
on
that
end
of
drag
link.
Jack
truck
chassis
down.
Refer
to
Part
1,
para
11-4.
5.
Take
safety
jacks
away.
END
OF
TASK
15-28
|
|
Privacy Statement - Press Release - Copyright Information. - Contact Us |
