 |
|||
|
|
|||
|
Page Title:
HORN BUTTON REMOVAL, REPAIR, AND REPLACEMENT - continued |
|
||
| ||||||||||
|
|
 TM 9-2320-209-20-3-1
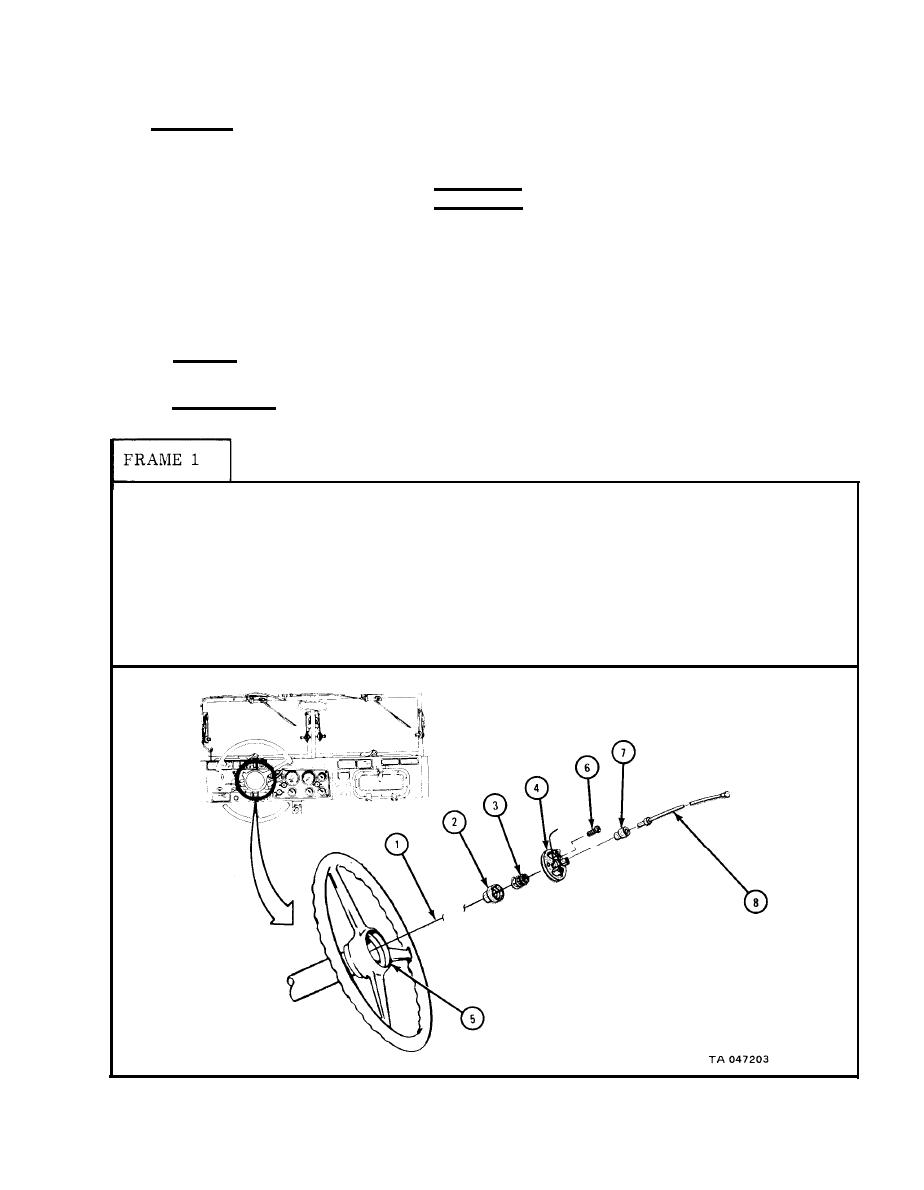
c. Repair. Repair the horn button by replacing any worn or damaged parts.
The horn button parts kit contains all parts shown in this procedure except the cable.
The cable must be ordered separately.
WARNING
Dry cleaning solvent is flammable. Do not
use near an open flame. Keep a fire ex-
tinguisher nearby when solvent is used.
Use only in well-ventilated places. Failure
to do this may result in injury to person-
nel and damage to equipment.
d. Cleaning. Before assembling horn button, clean all contacts using solvent.
Wipe out button recess in steering wheel.
e . Replacement.
1.
Put safety wire (1) through contact washer (2), spring (3), and base plate
(4). Set base plate in hub (5) and aline three holes in base plate with holes
in hub.
2.
Using screwdriver, screw three screws (6) through base plate (4) into hub (5).
3.
Slip insulator (7) over terminal end of horn cable (8) as shown.
4.
Join safety wire (1) to terminal end of horn cable (8).
GO TO FRAME 2
|
|
Privacy Statement - Press Release - Copyright Information. - Contact Us |
