 |
|||
|
|
|||
|
Page Title:
REAR WHEEL RING ADAPTER MAINTENANCE - continued |
|
||
| ||||||||||
|
|
 TM 9-2320-386-24-1-2
0347 00
REAR WHEEL RING ADAPTER MAINTENANCE (Contd)
NOTE
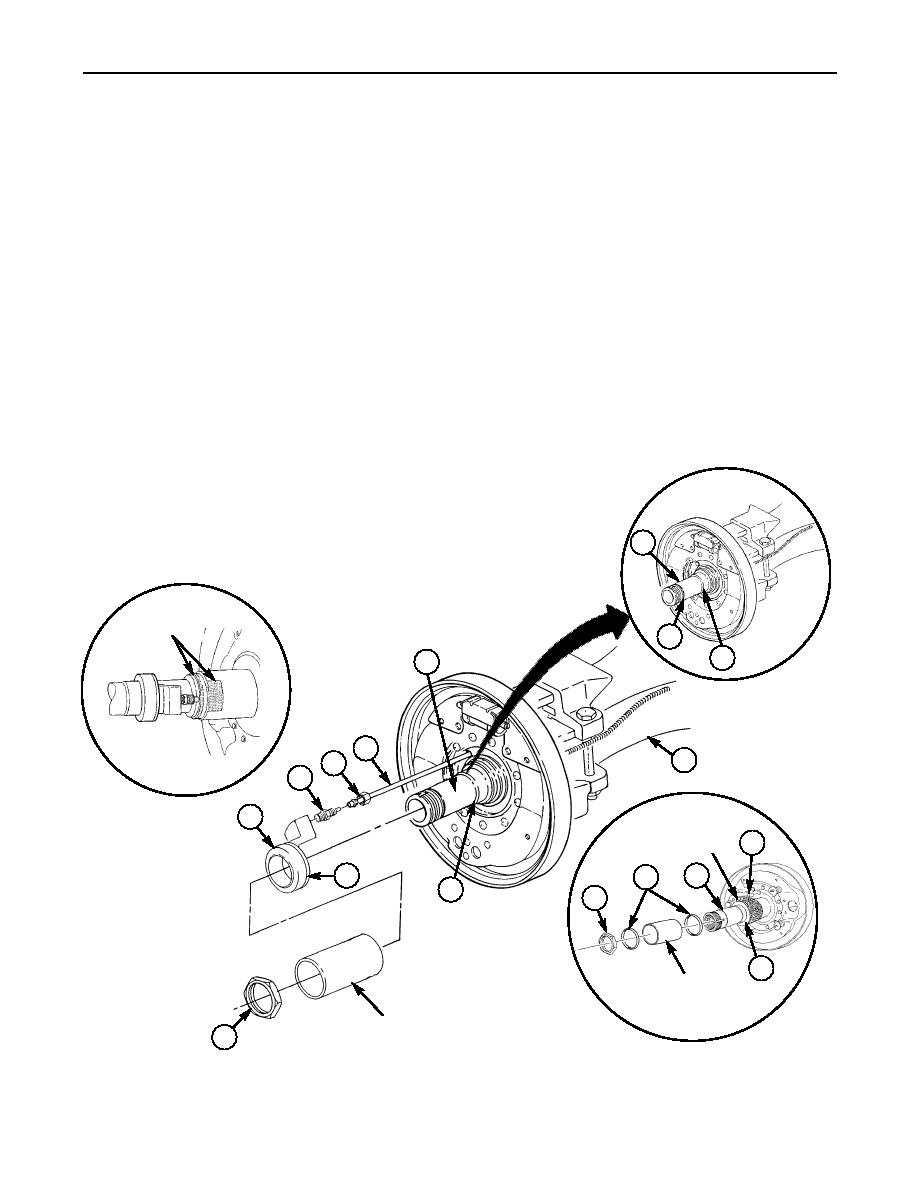
Allow 8 hours to cure epoxy.
6.
Remove nut (9) and air adapter repair fixture from axle spindle (5).
LEAK TEST
NOTE
Perform this task to check the integrity of the epoxy bond
between the ring adapter and axle spindle. If air bubbles are
present, remove epoxy with grinder and repeat removal, cleaning,
inspection, repair, and installation tasks.
1.
Install two O-rings (10), air adapter repair fixture, and nut (9) on axle spindle (5).
2.
Apply a soap water solution to interface of ring adapter (1) and axle spindle (5).
3.
Attach an air line to straight adapter (2), and apply 70 psi (481 kPa) air pressure, and check for
bubbles indicating an air leak. If no bubbles are present, proceed to step 4. If bubbles are present,
repeat removal, cleaning, inspection, repair, and installation tasks.
4.
Disconnect air pressure source from straight adapter (2), remove nut (9), two O-rings (10), and air
adapter repair fixture from axle spindle (5).
5.
Install CTIS tubing (4) on straight adapter (2) and tighten nut (3).
6.
Install brakeshoes (TM 9-2320-361-20).
7.
Install hubs and drums (WP 0173 00).
A
8.
Install rear wheel(s) (WP 0174 00).
EPOXY
ADHESIVE
5
B
5
4
6
3
2
~
1
EPOXY
ADHESIVE
2
8
5
10
7
9
1
AIR ADAPTER
REPAIR FIXTURE
AIR ADAPTER
REPAIR FIXTURE
9
END OF WORK PACKAGE
0347 00-5/6 blank
|
|
Privacy Statement - Press Release - Copyright Information. - Contact Us |
