 |
|||
|
|
|||
|
|
|||
| ||||||||||
|
|
 TM 9-2320-209-34-2-3
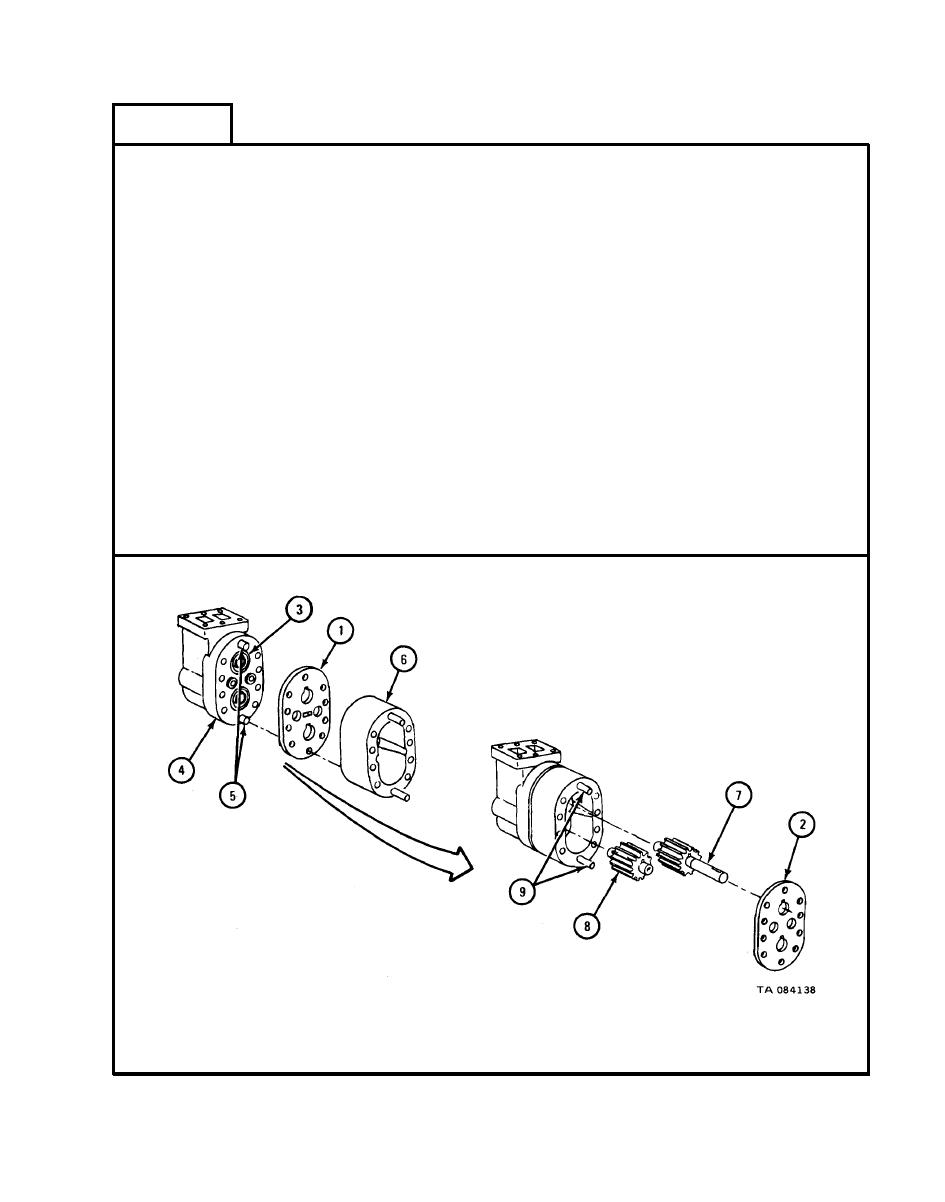
FRAME 2
NOTE
Put wear plates (1 and 2) back in same positions noted.
Press two bearings (3) into bores in rear end cover (4). Refer to Part 1,
1.
para 10-8.
Put wear plate (1) in place against rear end cover (4). Take care not to
2.
scratch or nick wear plate.
Put in two guide pins (5).
3.
Put pump body (6) on guide pins (5) and push it in place against wear
4.
plate (1). Notch on pump body must be on same side as notch on rear end
cover (4).
Put drive shaft assembly (7) and driven shaft assembly (8) into bores of
5.
bearings (3). Take care not to scratch or nick bearings or shafts.
6.
Put in two guide pins (9).
Put wear plate (2) on drive shaft assembly (7) and driven shaft assembly (8)
7.
and push it onto guide pins (9) in pump body (6). Take care not to scratch
or nick wear plate.
GO TO FRAME 3
18-211
|
|
Privacy Statement - Press Release - Copyright Information. - Contact Us |
