 |
|||
|
|
|||
|
|
|||
| ||||||||||
|
|
 TM
9-2320-209-20-3-3
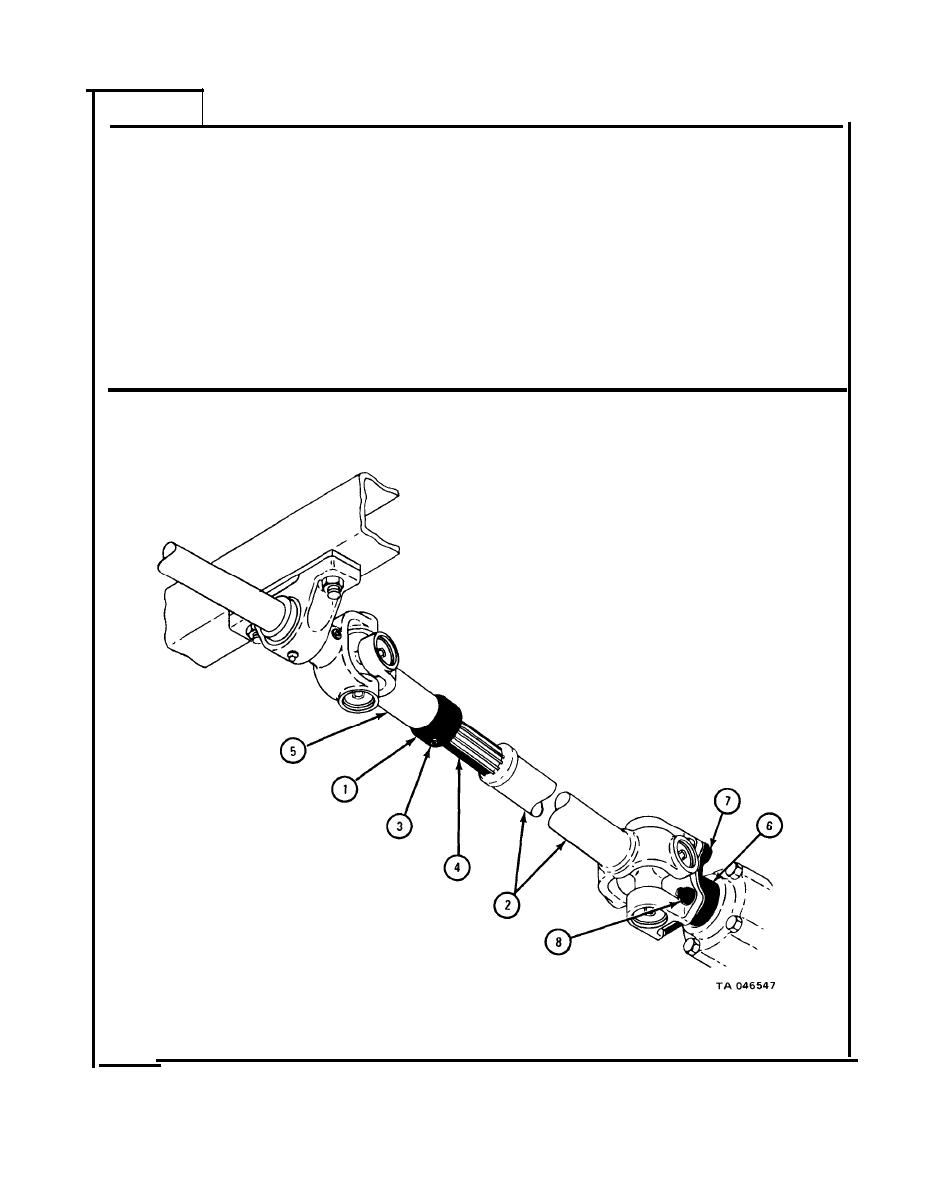
FRAME 6
Pull collar (1) onto front driveshaft (2) with setscrew (3) lined up with wide
1.
groove (4). Using 3/16-inch allen wrench, tighten setscrew, then unscrew it
one turn.
Look into universal joint ( 5). Find place where wide groove fits. Line up wide
2.
groove in front driveshaft (2) and put front driveshaft into universal joint.
Put front drive shaft (2) onto power takeoff flange (6), lining up screw holes.
3.
Put four screws (7) through screw holes and using 9/16-inch wrenches, screw
on and tighten four nuts (8) .
Slide collar (1) so that it is about 1/8 inch away from universal joint (5).
4.
Using 3/16-inch allen wrench, tighten setscrew ( 3).
GO TO FRAME 7
18-165
|
|
Privacy Statement - Press Release - Copyright Information. - Contact Us |
