 |
|||
|
|
|||
|
Page Title:
INSTALLING THE MOUNTING PLATE TO THE CARGO BED COVER |
|
||
| ||||||||||
|
|
 TM 10-5411-233-13&P
CARGO BED COVER (CBC), TYPE III, 2 1/2 T CARGO TRUCK, LMTV, AND LMTV TRAILER 0014 00
UNIT MAINTENANCE
INSTALLING THE MOUNTING PLATE TO THE CARGO BED COVER
The mounting plate assembly mounts to the carrier mounting angles located at the bottom of the lower
section of the CBC. The individual sections are secured to the carrier mounting angles using carriage
bolts, pan head screws, flat washers, lock washers, and nuts supplied with the mounting plate installation
kit.
Installing the front mounting plate section. Before installing the front and rear mounting plate sections,
be sure that the supporting blocks are located under the side walls of the CBC and are approximately 24
inches from the corners. This will provide adequate room to install the front and rear sections.
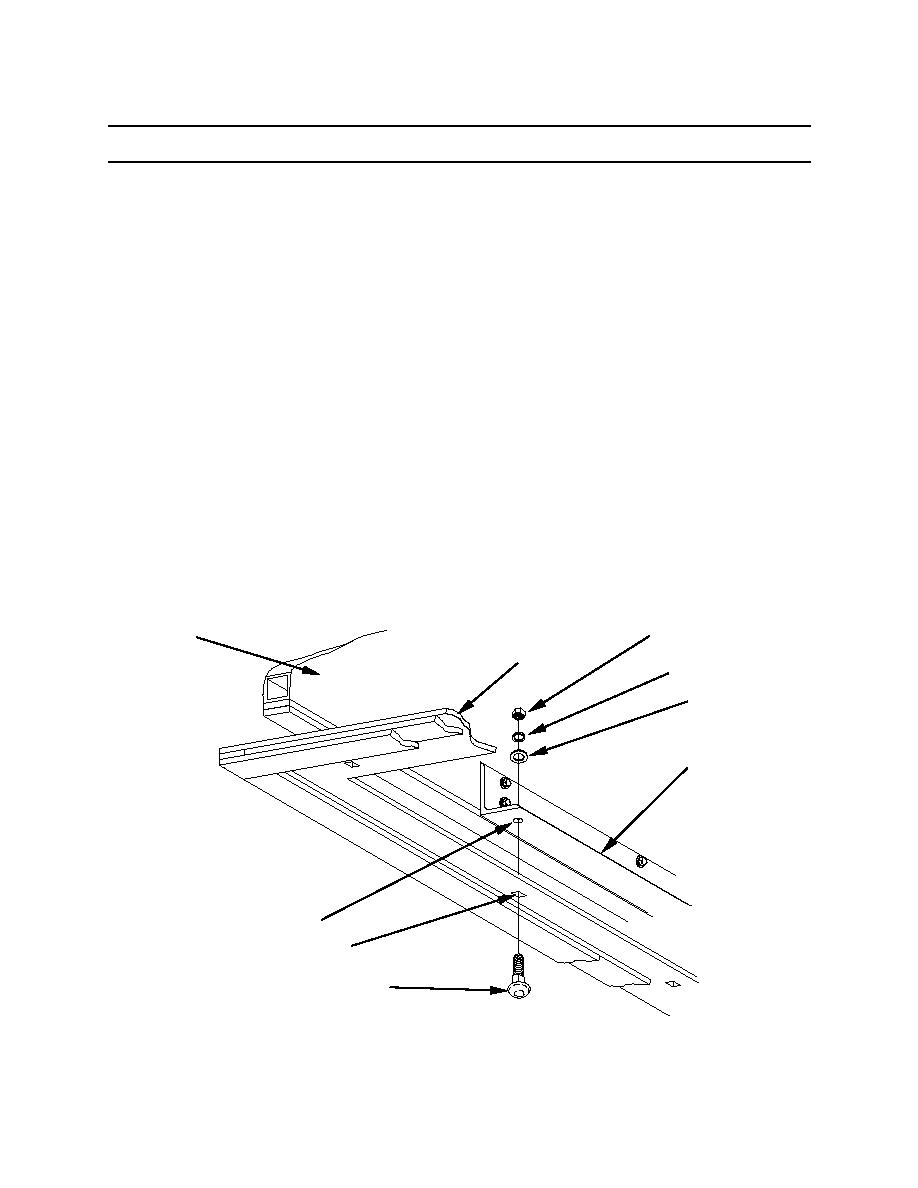
To install the front mounting plate section (1) to the CBC (2), position the section under the front carrier
mounting angle (3) of the CBC so that the face of the mounting plate section with the applied weather
stripping faces DOWN and toward the vehicle bed.
Press the mounting plate (1) up into position and align the holes (4) on the mounting plate with the holes
(5) on the carrier mounting angles (3).
Have a second person hold the mounting plate section (1) securely in position and install a total of eight
5/16-18 UNC x 1 inch long carriage bolts (6) up through the mounting plate (1) and through the CBC
carrier mounting angle (3). Install one 5/16 inch flat washer (7) over the end of the bolt and against the
surface of the carrier mounting angle, followed by a 5/16 inch lockwasher (8) and 5/16 UNC hex nut (9).
Repeat for all remaining screws.
Hand tighten all hardware, but do not tighten securely at this time.
9
2
1
8
7
3
5
4
6
0014 00-6
|
|
Privacy Statement - Press Release - Copyright Information. - Contact Us |