 |
|||
|
|
|||
|
Page Title:
STARTER SWITCH REPLACEMENT - continued |
|
||
| ||||||||||
|
|
 TM 9-2320-386-24-1-1
0093 00
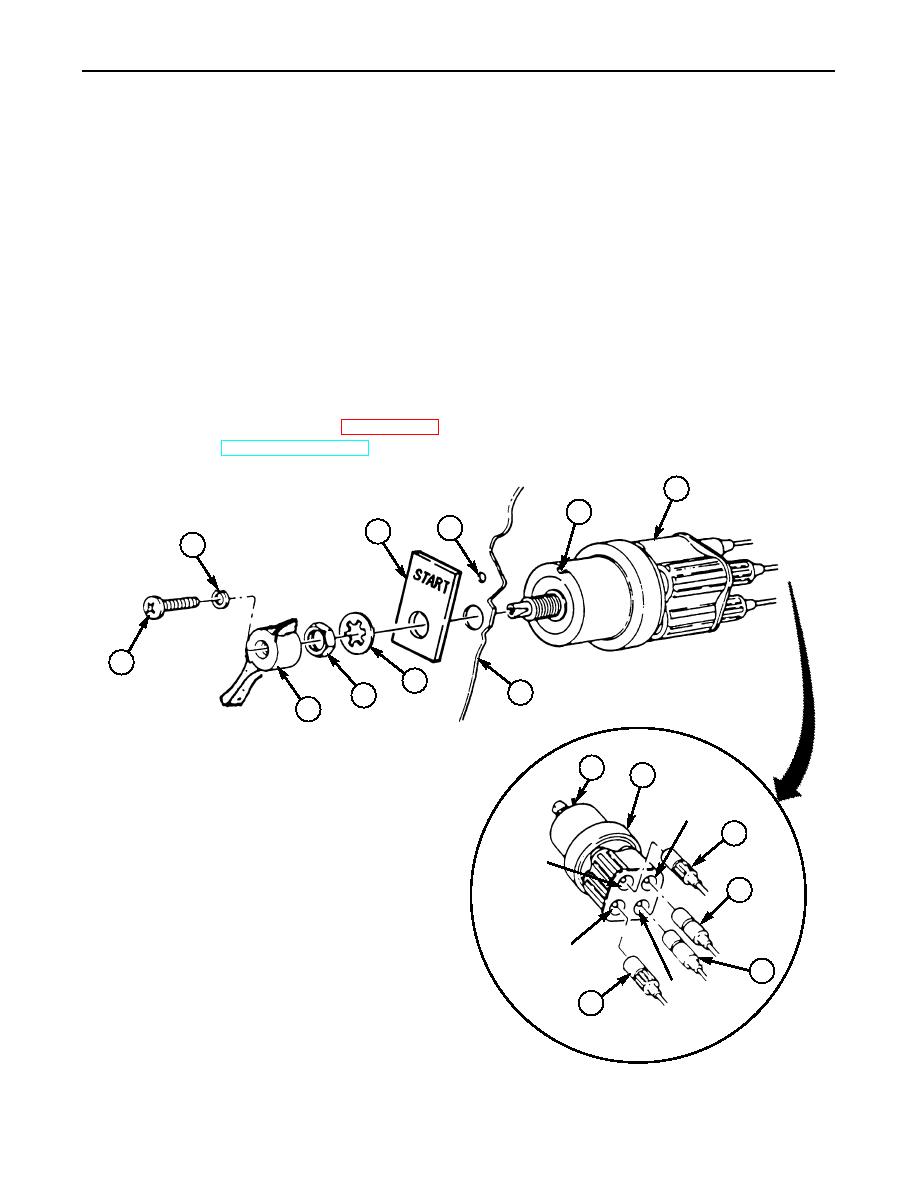
STARTER SWITCH REPLACEMENT (Contd)
REMOVAL
1.
Remove screw (9), lockwasher (10), and handle (8) from starter switch (4). Discard lockwasher (10).
2.
Remove nut (7), lockwasher (6), and switch plate (1) from starter switch (4). Discard lockwasher (6).
3.
Remove starter switch (4) from instrument panel (5).
NOTE
Tag all wires for installation.
4.
Disconnect wires 117 (11), 74A (12), 74 (13), and 118 (14) from starter switch (4).
INSTALLATION
1.
Connect ground wire 117 (11) to port A, load wire 74A (12) to port B, battery wire 74 (13) to port D,
and lamp wire 118 (14) to port C on starter switch (4).
2.
Align pin (3) with hole (2) and install starter switch (4) and switch plate (1) on instrument panel (5)
with new lockwasher (6) and nut (7).
3.
Install handle (8) on starter switch (4) with new lockwasher (10) and screw (9).
4.
Connect battery ground cable (WP 0121 00).
5.
Start engine (TM 9-2320-386-10).
4
3
2
1
10
9
6
5
7
8
3
4
LOAD
PORT B
11
GROUND
PORT A
12
LAMP
PORT C
13
BATTERY
PORT D
14
END OF WORK PACKAGE
0093 00-2
|
|
Privacy Statement - Press Release - Copyright Information. - Contact Us |
