 |
|||
|
|
|||
|
Page Title:
DIFFERENTIAL CARRIER REPLACEMENT - continued |
|
||
| ||||||||||
|
|
 TM 9-2320-361-24-2
0454 00
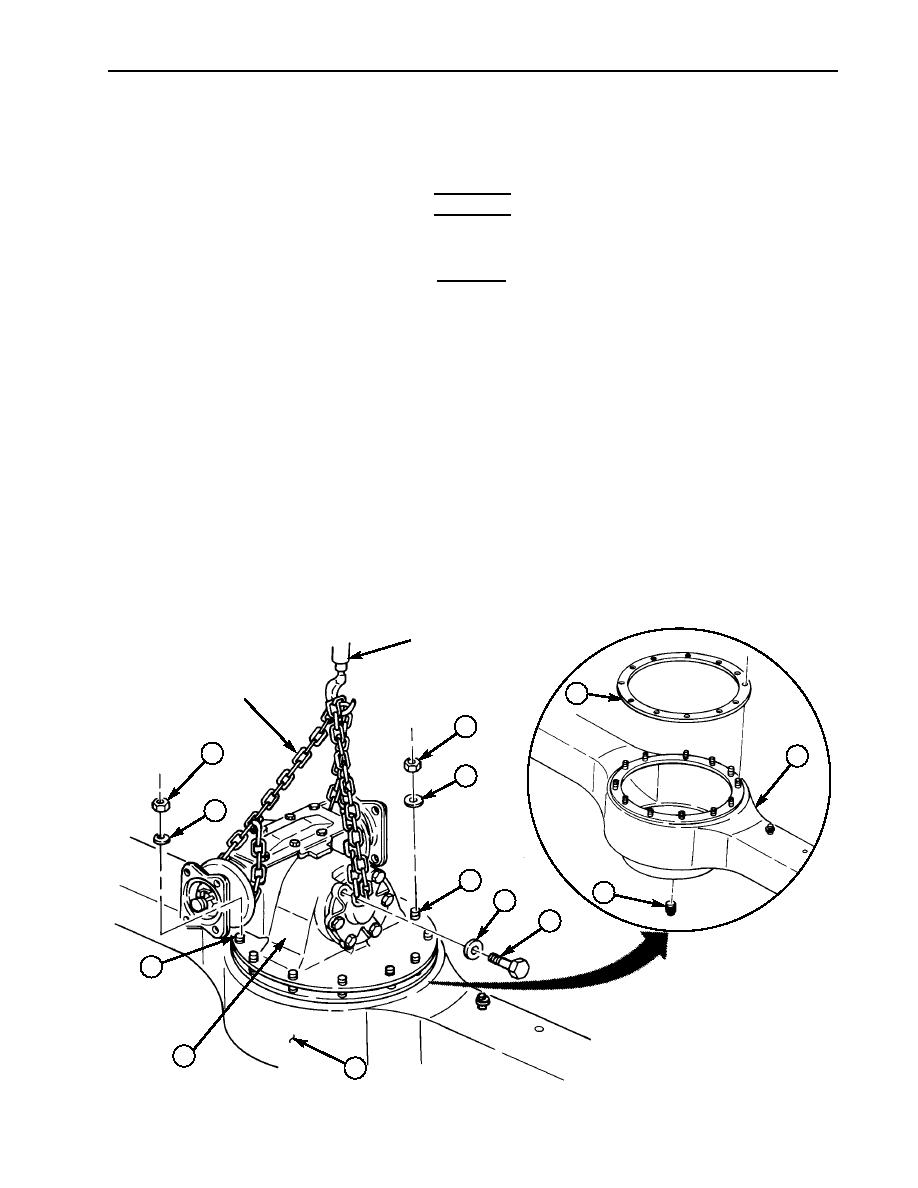
DIFFERENTIAL CARRIER REPLACEMENT (Contd)
INSTALLATION (Contd)
WARNING
All personnel must stand clear during lifting operations.
A swinging or shifting load may cause injury to personnel.
CAUTION
When lowering differential carrier onto axle housing, use care
not to damage mounting studs.
NOTE
Assistant will help with steps 4 and 5.
4.
Using lifting device, install carrier (7) on housing (6) leaving 1/2 in. (1.3 cm) gap between
carrier (7) and housing (6).
5.
Install four washers (9) and nuts (10) on studs (8) and lower carrier (7) onto housing (6).
6.
Install eight remaining washers (2) and nuts (1) on eight studs (3).
7.
Alternately tighten nuts (10) and (1).
8.
Remove lifting device from utility chain.
9.
Remove screw (5), washer (4), and utility chain from carrier (7).
10.
Install washer (4) and screw (5) on carrier (7). Tighten screw (5) 6585 lb-ft (88-115 Nm).
11.
Install drain plug (12) on bottom of housing (6). Tighten drain plug (12) 35 lb-ft (48 Nm).
12.
Install axle assembly (WP 0148 00 or WP 0151 00).
13.
Install axle shafts (WP 0147 00).
14.
Fill axle housing with GO 80/90 oil (WP 0020 00).
LIFTING DEVICE
11
CHAINS
1
10
6
2
9
3
12
4
5
~
8
7
6
END OF WORK PACKAGE
0454 00-3/4 blank
|
|
Privacy Statement - Press Release - Copyright Information. - Contact Us |
