 |
|||
|
|
|||
|
Page Title:
60-AMPERE ALTERNATOR REPAIR - continued |
|
||
| ||||||||||
|
|
 TM 9-2320-361-24-2
0448 00
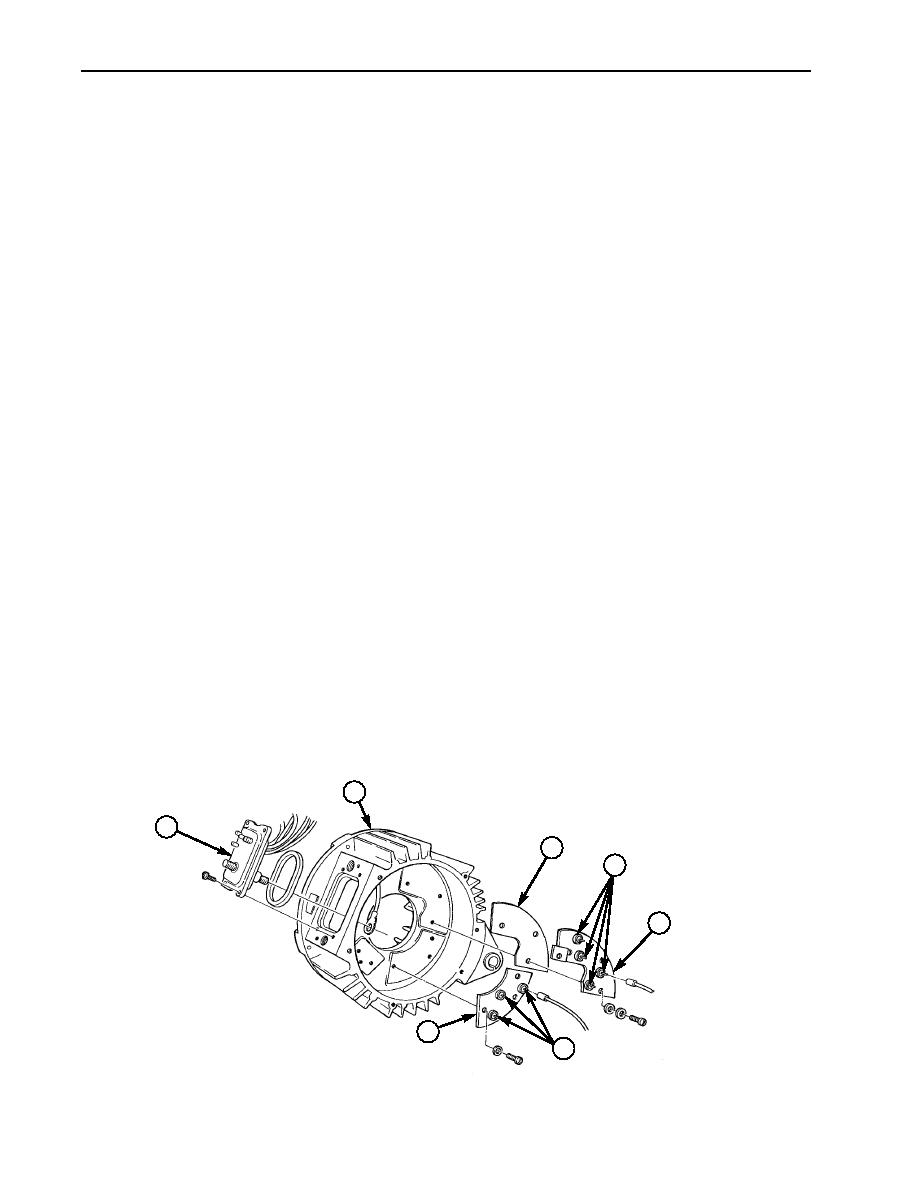
60-AMPERE ALTERNATOR REPAIR (Contd)
CLEANING AND INSPECTION
1.
For general cleaning and inspection instructions, refer to WP 0021 00.
2.
Inspect end housing (2) for cracks, breaks, and stripped threads. Replace end housing (2) if
defective.
3.
Check brushes (11) for roughness, galling, and wear. Replace brushes (11) if rough, worn, or brush
length is less than 0.250 in. (6.35 mm).
4.
Check brush holder (8), brush holder insulator (9), and positive rectifier insulator (3) for cracks
and breaks. Replace brush holder (8), brush holder insulator (9), or positive rectifier insulator (3) if
cracked or broken.
5.
Check brush springs (10) for damage. Replace brush springs (10) if damaged.
6.
Check output plate (1) for burned, frayed, or broken wiring. Replace output plate (1) if defective.
7.
Check rectifier terminals (4) and (6) in rectifier plates (5) and (7) for continuity in one direction
and infinite resistance in opposite direction. Replace rectifier terminals (4) or (6) if defective. Check
for shorts from rectifier terminals (4) and (6) to rectifier plates (5) and (7). Replace rectifier plate
(5) or (7) if defective.
8.
Check stator (18) for grounds. Touch multimeter negative probe to stator (18) and positive probe to
the following stator leads: (a) lead (15), (b) lead (16), and (c) lead (17). If continuity is present in
any check, stator (18) is grounded; replace alternator.
9.
Check stator (18) for open circuits. Touch multimeter probes to the following stator leads:
(a) leads (15) and (16), (b) leads (16) and (17), and (c) leads (15) and (17). If continuity is NOT
present in any check, replace alternator.
10.
Check rotor (14) for grounds. Touch multimeter probe to rotor shaft (13) and other probe to slip
ring (12). If ohmmeter does not read over 10,000 ohms, replace alternator.
11.
Inspect rotor (14) bearing surfaces (TM 9-214). If bearing is defective, replace.
12.
Inspect intermediate housing (20) for cracks, breaks, and stripped threads. Replace alternator if
cracked, broken, or threads are stripped.
13.
Inspect drive end housing (19) for cracks and breaks. Replace alternator if housing (19) is cracked
or broken.
14.
Replace end cover (21) if all components pass testing and problem remains.
2
1
3
4
5
7
6
0448 00-10
|
|
Privacy Statement - Press Release - Copyright Information. - Contact Us |
