 |
|||
|
|
|||
|
Page Title:
SAFETY SWITCH BOX REPLACEMENT - continued |
|
||
| ||||||||||
|
|
 TM 9-2320-361-24-2
0318 00
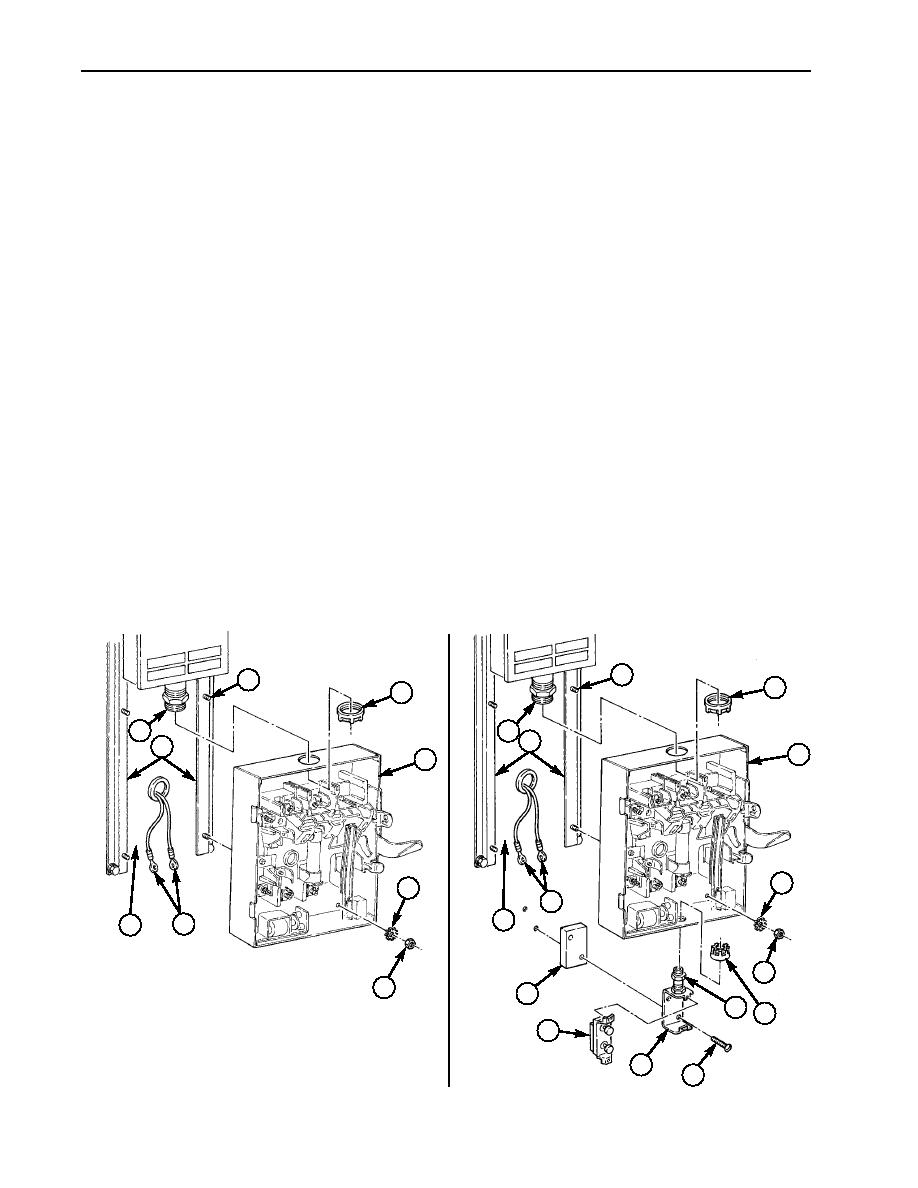
SAFETY SWITCH BOX REPLACEMENT (Contd)
REMOVAL (Contd)
6.
Remove bushing (3) from nipple (1) and safety switch box (4).
7.
Remove four nuts (6) and lockwashers (5) from studs (2) and remove safety switch box (4) from
mounting brackets (9) and van body wall (8). Discard lockwashers (5).
NOTE
Perform steps 8 through 10 on M185A3 vehicles.
8.
Remove bushing (10) from nipple (11) and safety switch box (4).
9.
Remove START/STOP switch (14) from switch bracket (13).
10.
Remove two screws (12), switch bracket (13), and spacer (15) from van body wall (8).
INSTALLATION
1.
Pull wires (7) through access hole in safety switch box (4).
2.
Install safety switch box (4) on nipple (1) and studs (2) of mounting brackets (9) with bushing (3),
four new lockwashers (5), and nuts (6).
NOTE
Perform steps 3 through 7 on M185A3 vehicles.
3.
Install spacer (15), switch bracket (13), and nipple (11) on safety switch box (4) and van body
wall (8) with bushing (10) and two screws (12).
4.
Install START/STOP switch (14) in switch bracket (13).
2
2
3
3
1
1
9
9
4
4
~
~
5
5
7
8
7
8
6
6
15
11 10
14
13
12
0318 00-4
|
|
Privacy Statement - Press Release - Copyright Information. - Contact Us |
