 |
|||
|
|
|||
|
Page Title:
STARTER SWITCH REPLACEMENT - continued |
|
||
| ||||||||||
|
|
 TM 9-2320-361-24-1
0089 00
STARTER SWITCH REPLACEMENT (Contd)
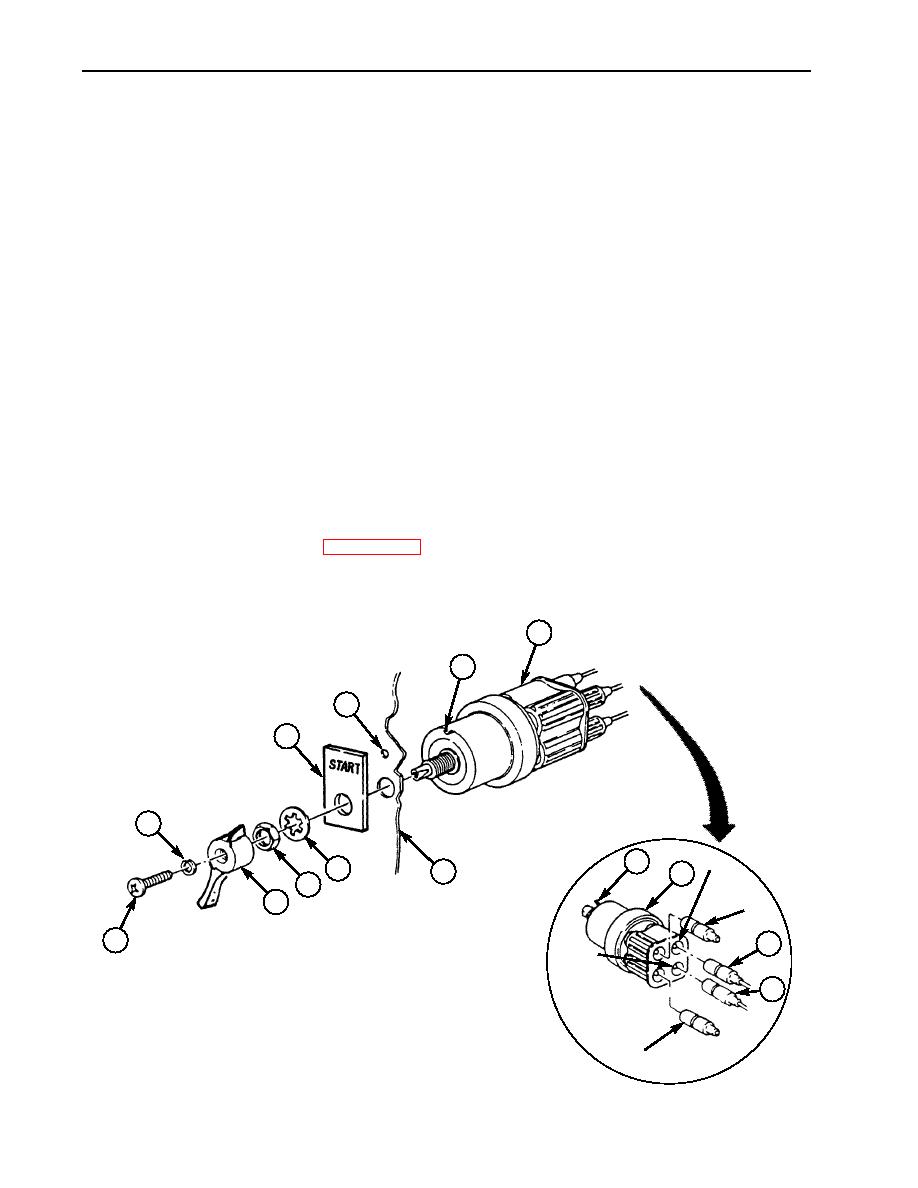
REMOVAL
1.
Remove screw (9), lockwasher (10), and handle (8) from starter switch (4). Discard lockwasher (10).
2.
Remove nut (7), lockwasher (6), and switch plate (1) from starter switch (4). Discard lockwasher (6).
3.
Remove starter switch (4) from instrument panel (5).
NOTE
Prior to removal, tag all leads for installation.
4.
Disconnect lead wires 74A (11) and 74 (12) from starter switch (4).
5.
Remove plugs from starter switch (4).
INSTALLATION
1.
Install plugs in starter switch (4).
2.
Connect load lead wire 74A (11) to port B and battery lead wire 74 (12) to port D on starter
switch (4).
3.
Align pin (3) with hole (2) and install starter switch (4) and switch plate (1) on instrument
panel (5) with new lockwasher (6) and nut (7).
4.
Install handle (8) on starter switch (4) with new lockwasher (10) and screw (9).
5.
Connect battery ground cable (WP 0126 00).
6.
Start and stop engine (TM 9-2320-361-10).
7.
Release parking brake and remove wheel chocks (TM 9-2320-361-10).
4
3
2
1
10
3
6
5
4
LOAD
7
PORT B
8
PLUG
9
11
BATTERY
PORT D
12
PLUG
END OF WORK PACKAGE
0089 00-2
|
|
Privacy Statement - Press Release - Copyright Information. - Contact Us |
