 |
|||
|
|
|||
|
Page Title:
ALTERNATOR AND PULLEY REMOVAL AND REPLACEMENT - continued |
|
||
| ||||||||||
|
|
 TM 9-2320-209-20-3-1
FRAME 4
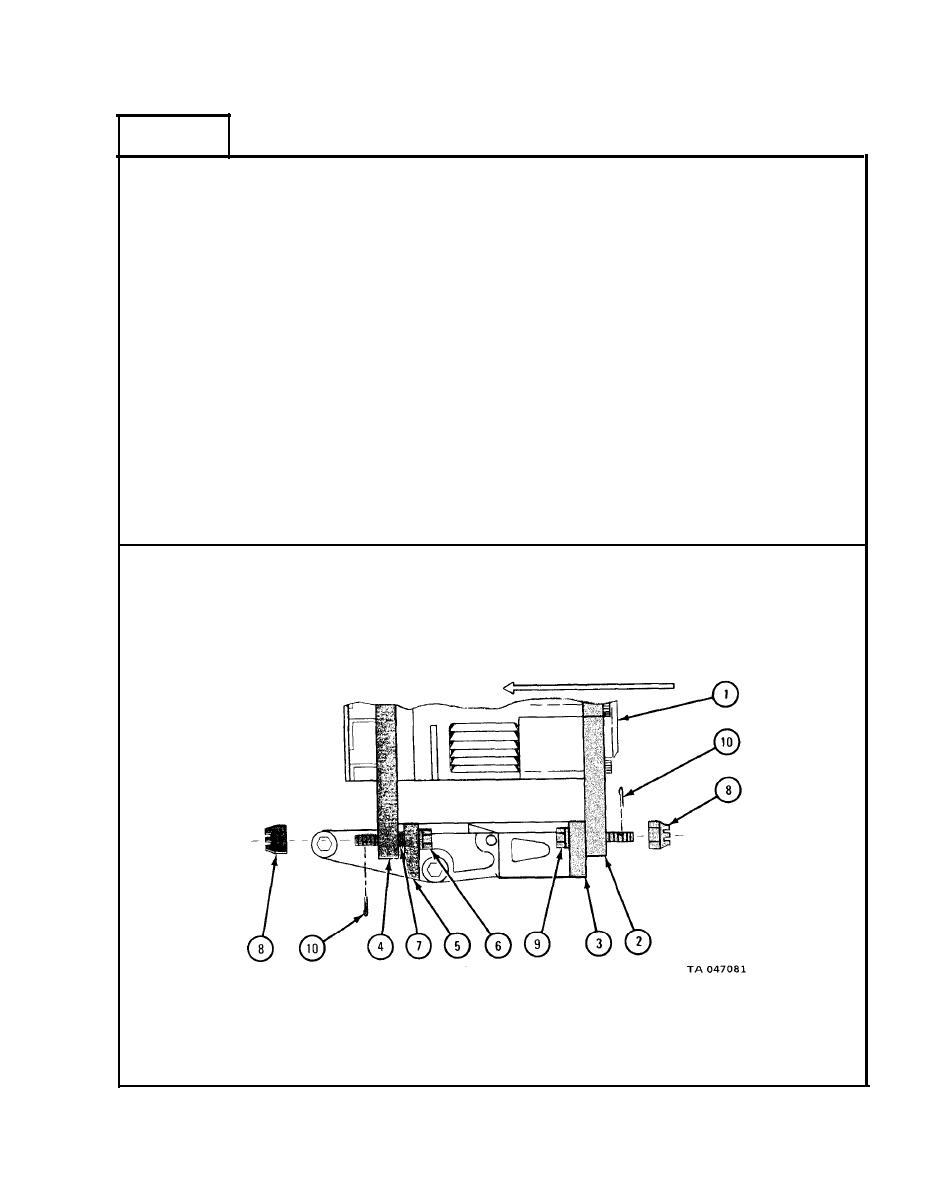
Push alternator (1) toward firewall as shown. Front flange (2) on alternator
1.
must be hard against mounting bracket front flange (3).
Put 0.005-inch feeler gage between rear flange (4) on alternator (1) and
2.
mounting bracket rear flange (5). Feeler gage should fit between flanges very
easily.
NOTE
Hold rear of alternator (1) up when sliding bolt (6)
out of rear mounting flange (4) to put in shims (7).
Pull bolt (6) out of rear flange (4) on alternator (1). Slip shim (7) between
3.
alternator flange (4) and mounting bracket rear flange (5). Put bolt back in.
Do steps 1, 2, and 3 again as necessary, adding shims (7) until feeler gage
4.
makes snug fit between shims and alternator flange (4).
Screw two nuts (8) on bolts (6 and 9). Using torque wrench, tighten nuts to
5.
65 to 70 pound-feet.
6. Using pliers, put two cotter pins (10) through nuts (8) and bolts (6 and 9).
GO TO FRAME 5
7-23
|
|
Privacy Statement - Press Release - Copyright Information. - Contact Us |
