 |
|||
|
|
|||
|
Page Title:
FUEL FILTER ASSEMBLIES REMOVAL , REPLACEMENT, AND AIR BLEEDING - continued |
|
||
| ||||||||||
|
|
 TM 9-2320-209-20-3-1
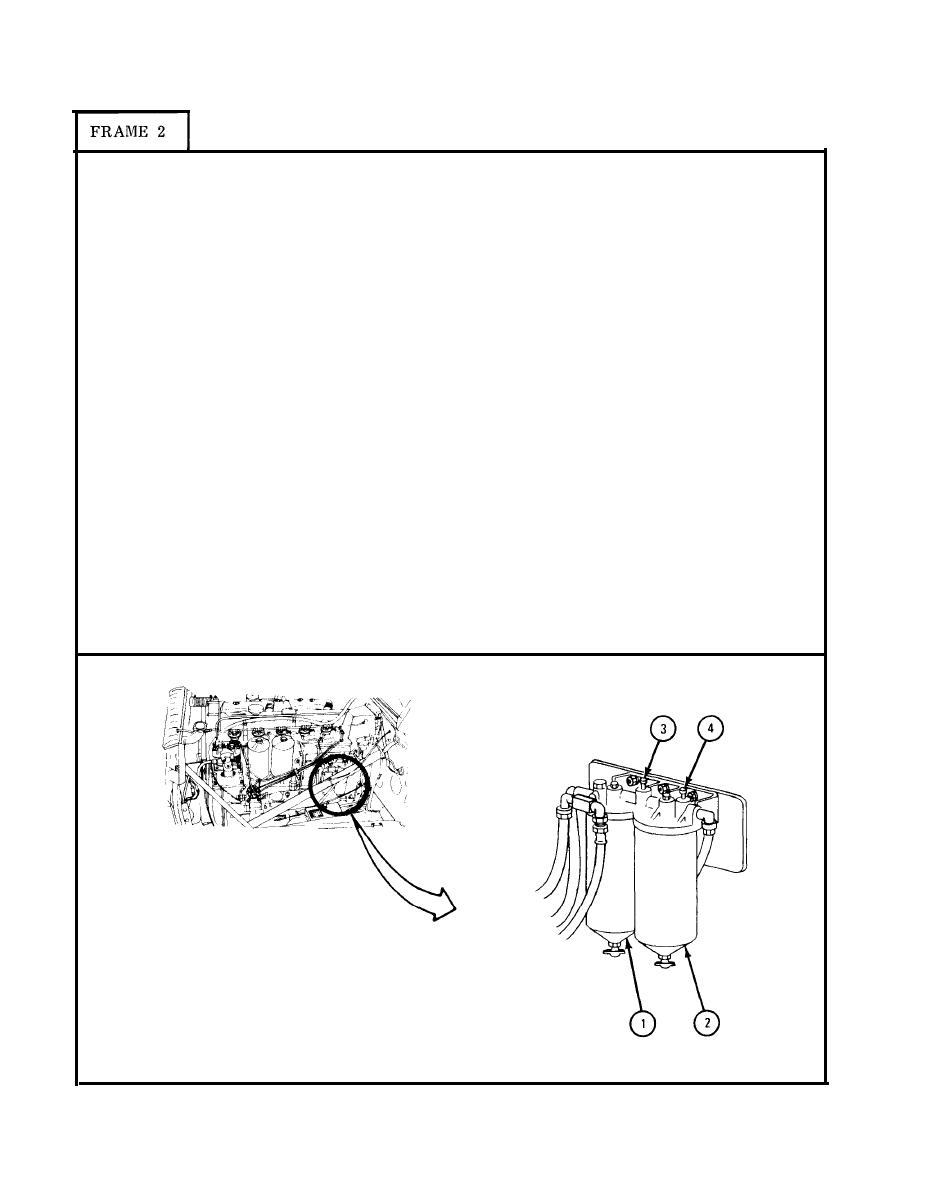
1.
Place container under fuel filters (1 and 2) to catch fuel.
NOTE
Some trucks have only one bleeder valve on the filters,
but task is done the same way.
2.
Using 7/16-inch wrench, loosen bleeder valve (3) on secondary fuel filter (1).
When fuel starts to flow out of bleeder valve, close valve.
Using 7/16-inch wrench, loosen bleeder valve (4) on final fuel filter (2).
3.
When fuel starts to flow out of bleeder valve, close valve.
Open and close bleeder valves ( 3 and 4) in turn, until fuel is clear of air
4.
bubbles.
Start engine. Refer to TM 9-2320-209-10.
5.
With engine running, open and close bleeder valves ( 3 and 4) in turn until
6.
fuel is clear of air bubbles.
Using 7/16-inch wrench, tighten bleeder valves ( 3 and 4) . Shut off engine.
7.
Refer to TM 9-2320-209-10.
Using rags, wipe both fuel filters clean of fuel.
8.
NOTE
Follow-on Maintenance Action Required:
Close hood and both side panels. Refer to TM 9-2320-260-10.
END OF TASK
TA
047013
4-62
|
|
Privacy Statement - Press Release - Copyright Information. - Contact Us |
