 |
|||
|
|
|||
|
Page Title:
INTAKE AIR CLEANER REMOVAL, REPAIR, AND REPLACEMENT - continued |
|
||
| ||||||||||
|
|
 TM 9-2320-209-20-3-1
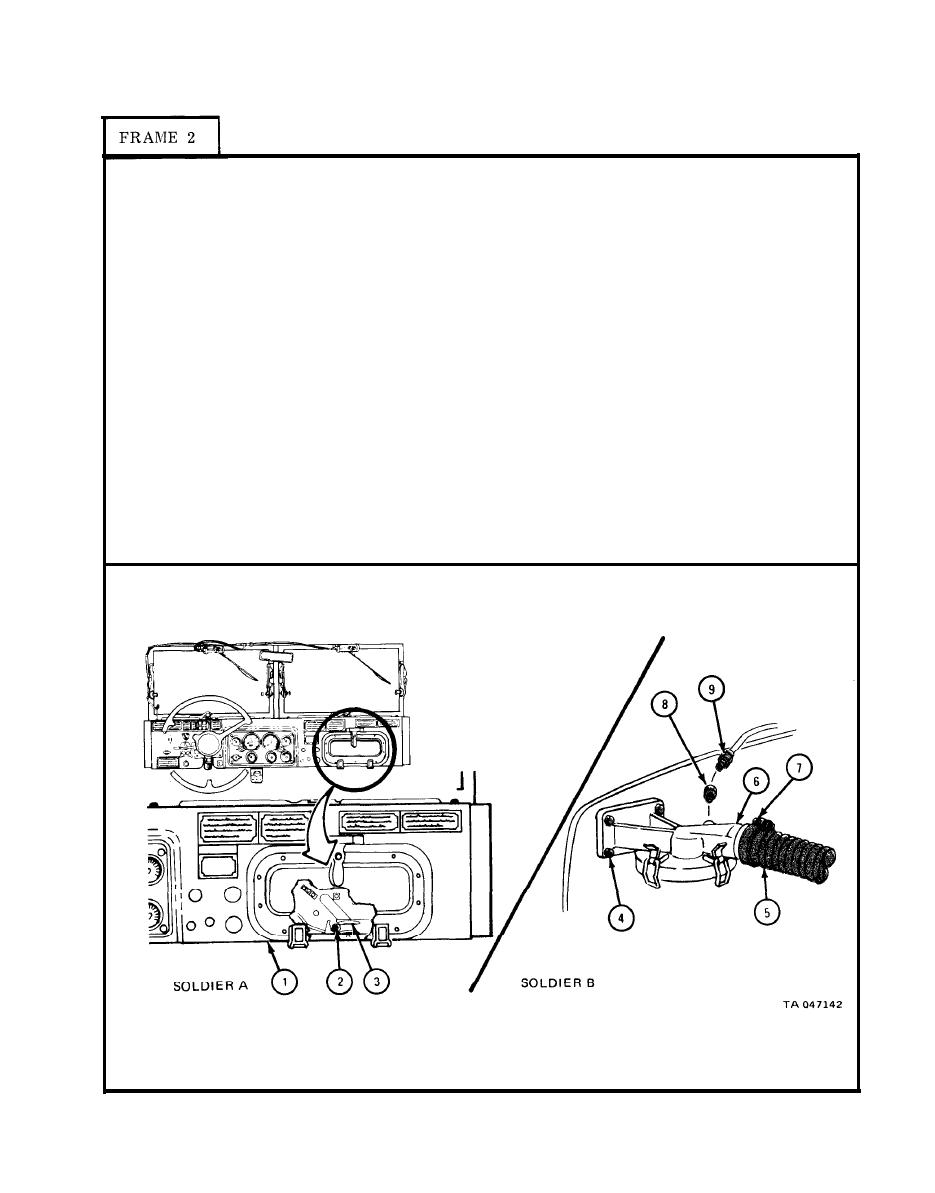
Reaching up behind instrument panel (1) and using 9/16-inch
Soldier A 1.
wrench, hold air cleaner mounting nut (2) in place on bracket
(3) . Tell soldier B when ready.
Soldier B 2.
Using 9/16-inch wrench, screw in and tighten four air cleaner
mounting bolts (4) .
3.
Put tube assembly (5) on air cleaner head (6). Using flat-tip
screwdriver, tighten clamp screw (7) .
Using 7/16-inch wrench, screw in and tighten connector and
4.
filter (8) into hole in air cleaner head (6).
5.
Using 9/16-inch wrench, screw in and tighten coupling nut (7)
into connector and filter assembly (8) .
NOTE
Follow-on Maintenance Action Required:
1.
Replace air filter element. Refer to TM 9-2320-209-10.
2.
Close hood and left side panel. Refer to
TM 9-2320-209-10.
END OF TASK
4-5
|
|
Privacy Statement - Press Release - Copyright Information. - Contact Us |
