 |
|||
|
|
|||
|
Page Title:
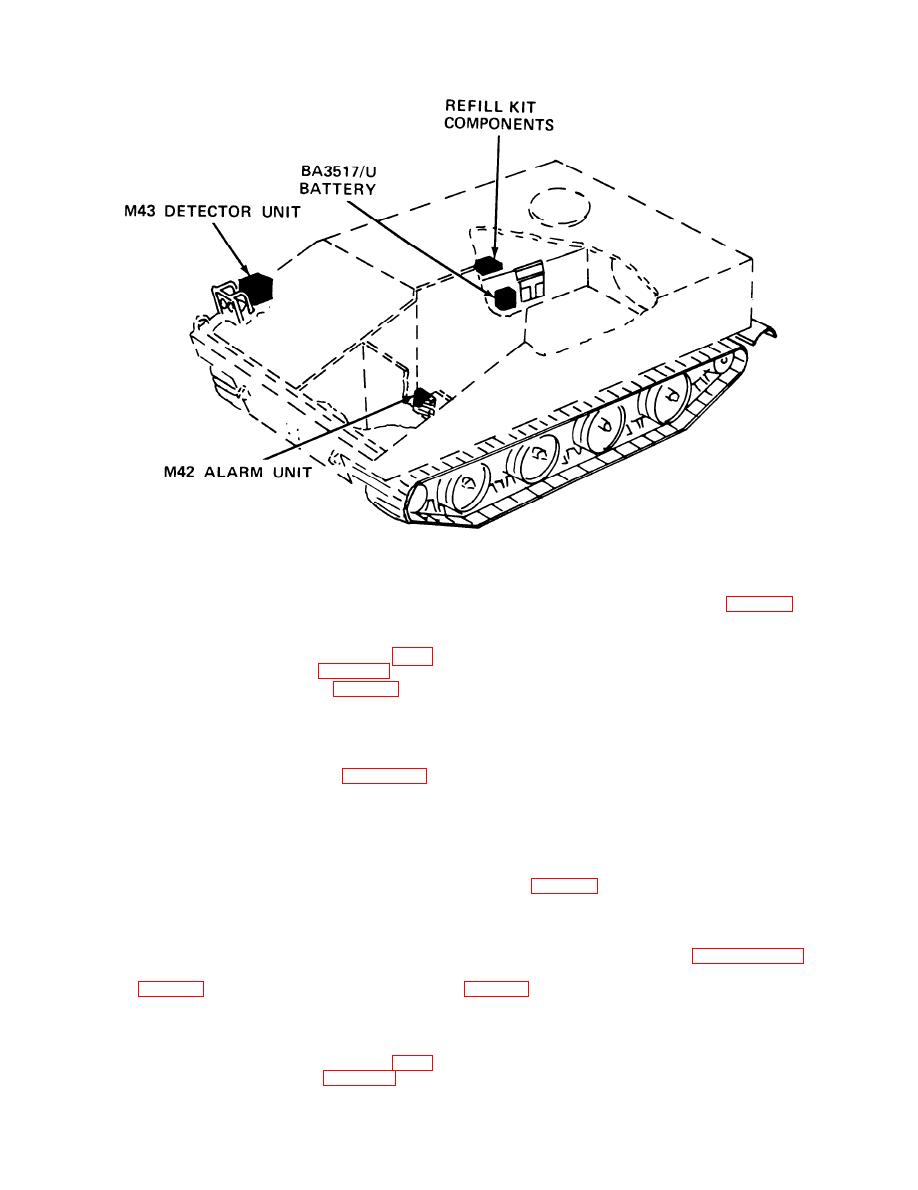
Figure 3-10. M15 alarm system installed in an armored command and reconnaissance carrier. |
|
||
| ||||||||||
|
|
 TM 3-6665-225-12
Figure 3-10. M15 alarm system installed in an armored command and reconnaissance carrier.
c. Installing an M43 Detector Unit Without a
(2) Loosen two wingnuts (1, fig. 3-13) by
Battery in a High Profile Mount (Part of M228
turning them counterclockwise.
Mounting Kit).
(3) Pivot swing clamp (2) forward and down.
(1) Perform preoperation procedures (para
(4) Position the M43 detector unit on low
2-6) and pre-startup procedures (para 2-7).
profile mount.
(2) Loosen two wingnuts (1, fig. 3-12) by
(5) Rotate swing clamp (2) until it is posi-
turning them counterclockwise.
tioned on top edge of M43 detector unit front
(3) Pivot swing clamp (2) forward and down.
panel. Tighten wingnuts (1).
(4) Lower shelf (4) to horizontal position.
NOTE
(5) Position M43 detector unit on shelf of
Do not connect cable assembly con-
M228 high profile mount as shown in figure 3-12.
nector (3) to 24 VDC INPUT connector
(6) Rotate swing clamp (2) until it is posi-
(4) until so instructed.
tioned on top edge of M43 detector unit front
panel. Tighten wingnuts (1).
(6) Install M42 alarm in vehicle (g or h
below).
NOTE
(7) Perform startup and operation pro-
Do not connect cable assembly con-
cedures (para 2-9) to place equipment in opera-
nector (3) to 24 VDC INPUT connector
tion.
(5) until so instructed.
e. Installing an M42 Alarm Unit in a 1/4-Ton
(7) Install M42 alarm unit in vehicle (d, e, or
Utility Truck.
f below).
(1) Perform procedures of paragraph 2-6 b.
(8) Perform startup and operation pro-
(2) Position M42 alarm unit in bracket (2,
cedures (para 2-9) to place equipment in opera-
tion.
(3) Install latch lamping catches (3) over
d. Installing an M43 Detector in a Low Profile
knurled screws (4) on M42 alarm unit.
Mount (Part of M182 Mounting Kit).
(4) Remove protective tape from ends of
(1) Perform preoperation procedures (para
cable harness wires (5) and connect wires to
2-6a) and pre-startup procedure (para 2-7).
binding posts (6).
3-10
|
|
Privacy Statement - Press Release - Copyright Information. - Contact Us |
